Employee Documents
Upload and review documents attached to an employee.
Upload and review documents
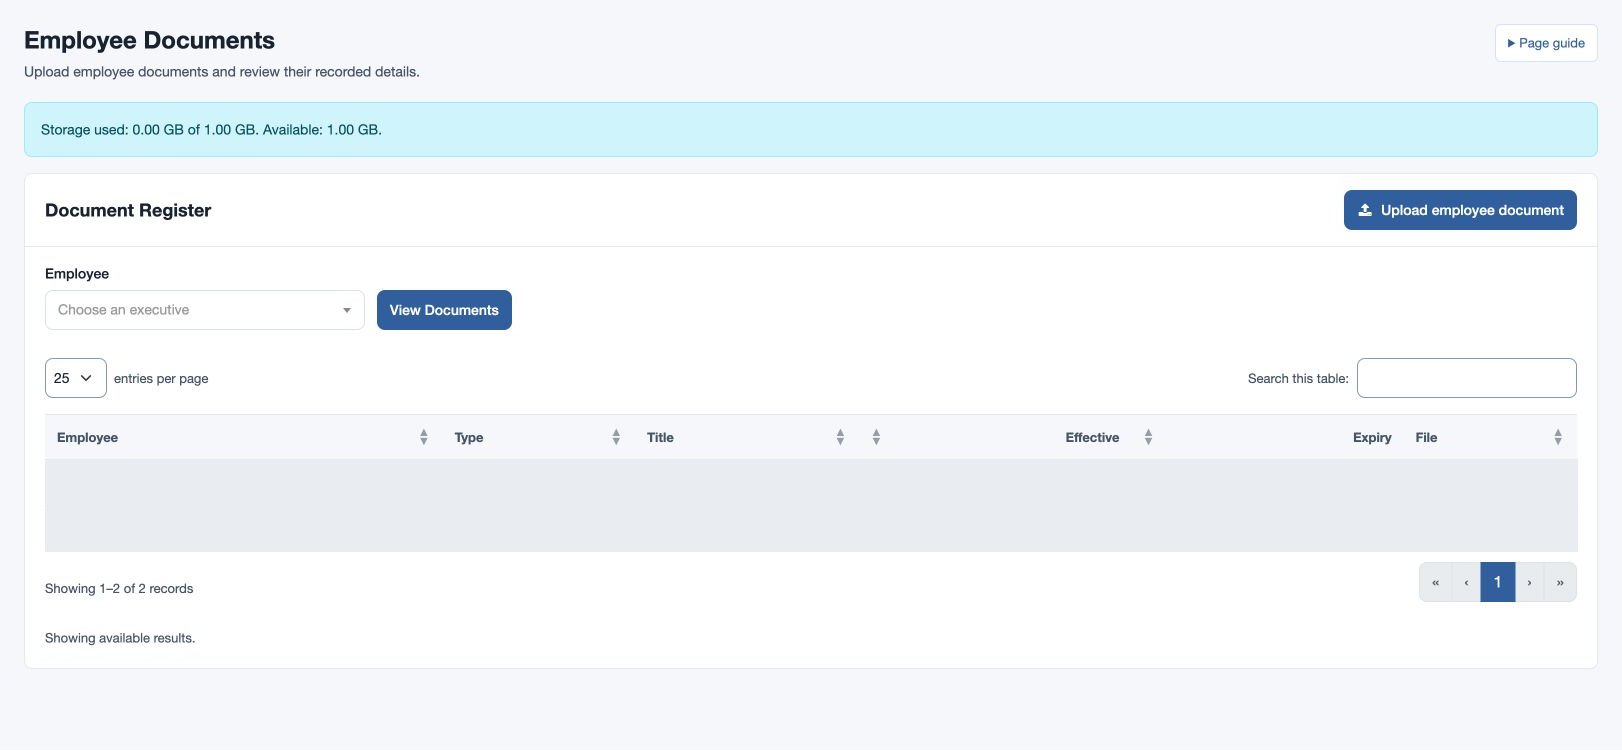
Open HR & attendance → People → Employee Documents, or choose Documents on an Employee Master row. Document access requires the appropriate permission and employee scope.
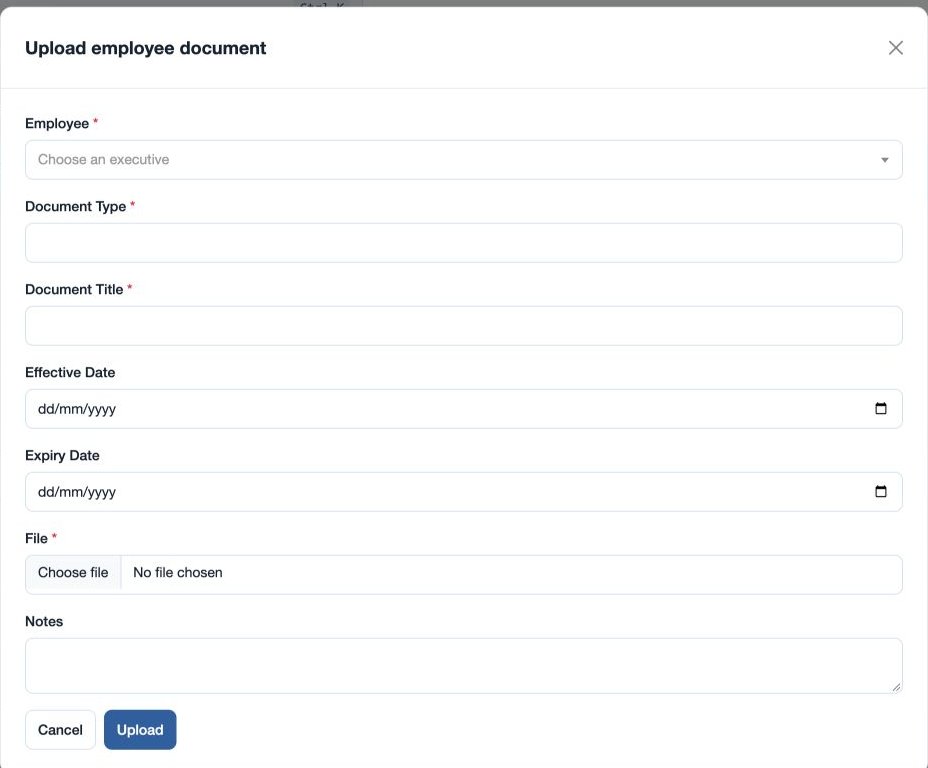
- Select Employee, enter Document Type and Document Title, and choose a File; these are required.
- Optionally supply Effective Date, Expiry Date and Notes. Record expiry for time-limited documents.
- Upload and check the Document Register. Filter by Employee to see that person’s Type, Title, Effective, Expiry and File link. Open the file to verify it is the intended document.
For example, attach a fictional employment agreement titled “Agreement 2026” with its effective date. If no row appears, check the employee filter and permission; if upload fails, check the required fields and file and try again.
The upload form is opened with Upload Employee Document. The Employee filter and View Documents action control the register, while Employee in the upload form identifies the file’s owner. Check the selected person before uploading, particularly when opening the page from a different employee’s row.
File limits and storage
Document Type accepts up to 80 characters, Document Title up to 120 and Notes up to 1,000. Files must be nonempty and no larger than 10 MB, with a PDF, JPG, JPEG, PNG, DOC, DOCX, XLS, XLSX, CSV or TXT extension. The file’s detected type must also be permitted. Storage used and available appear above the register; if the company storage limit is reached, free capacity or arrange additional space before retrying. Search the employee picker by name, email, phone or code. Use Clear to remove an active employee filter and Previous/Next to browse the register.