Create or edit a real estate project
A project groups the units of one development. Open Real Estate → Projects, then select Add project or open a project name. Project managers can create or edit active projects; readers and users viewing an archived project see its details without editing controls. See Projects for the list and archive procedure.
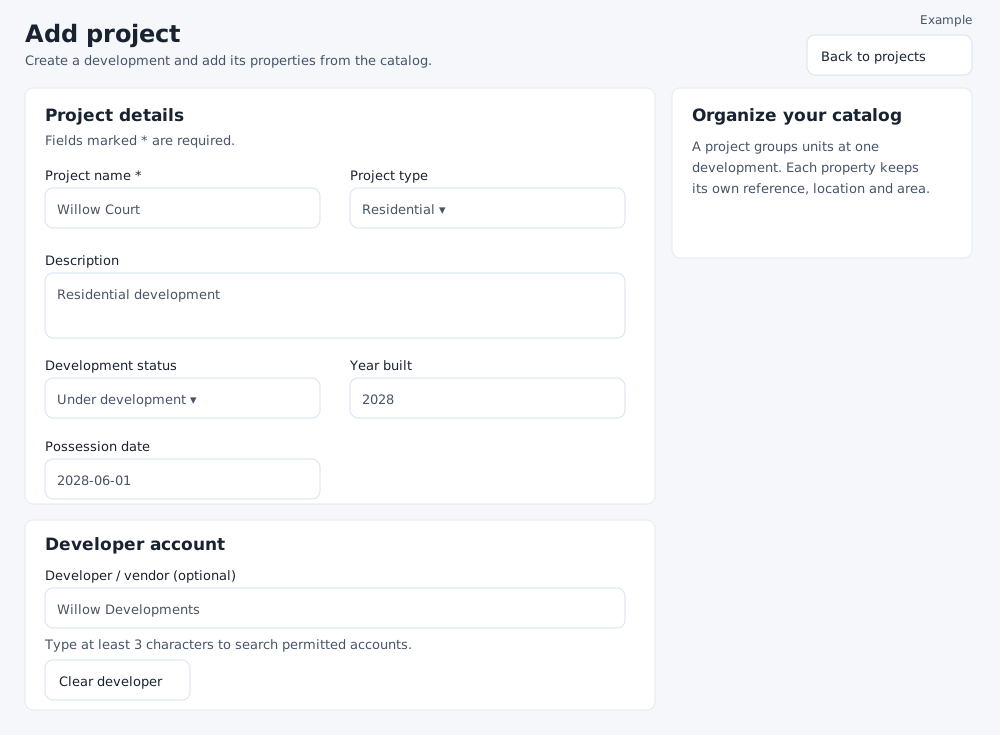
Enter project details
- Enter the required Project name, up to 90 characters. Optionally select Project type: Residential, Commercial, Industrial or Land; choose Not selected if unknown.
- Enter an optional Description of up to 65,535 characters. Choose Development status: Planned, Under development, Completed, In possession or Not selected. This is the construction stage, separate from Active or Archived catalog status.
- Optionally enter Year built as a whole year from 1000 to 9999 and a valid Possession date from 1000-01-01 through 9999-12-31.
Link a developer account
When account search is available, type at least three characters in Developer / vendor, then select a permitted account from the results. The search accepts up to 120 characters. A typed name alone is not a selected account. Use Clear developer to remove the selection, or leave it empty. If the search is unavailable for your role, an existing developer link is retained when you save other details. Account lookup and access to the account control which results are available.
Set the location
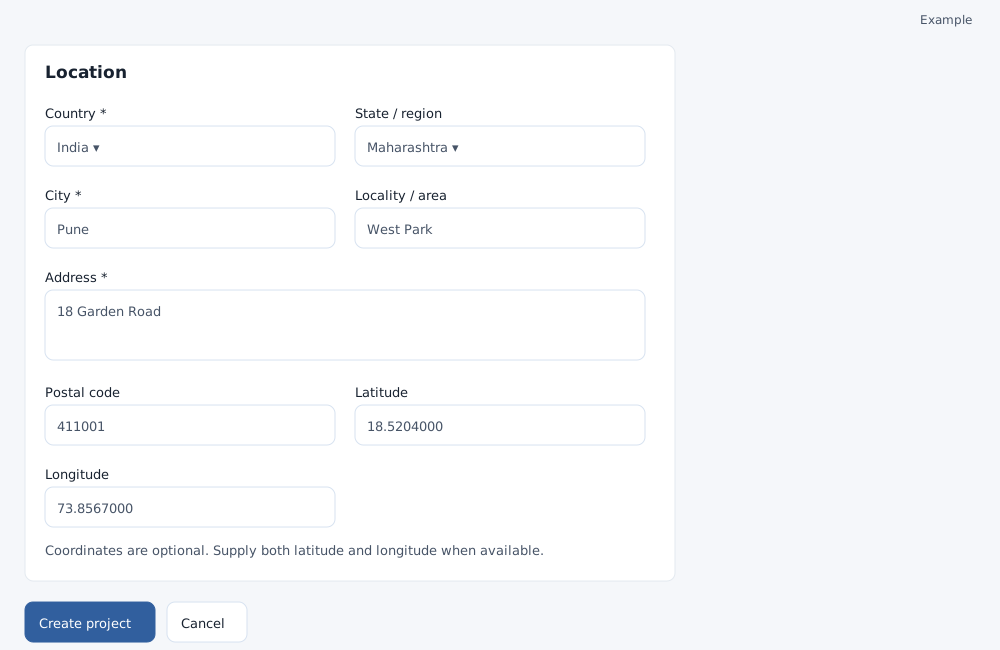
- Select required Country. Wait for regions to load, then optionally choose a State / region belonging to that country.
- Enter required City (up to 90 characters) and Address (up to 65,535). Optionally enter Locality / area (45 maximum) and Postal code (8 maximum).
- Optionally enter both Latitude and Longitude, or leave both blank. Latitude ranges from −90 to 90 and longitude from −180 to 180; each accepts up to seven decimal places.
- Select Create project or Save changes. The saved project opens with a confirmation; check the information and Activity revisions. View properties opens its units when you have catalog access. Cancel, Back or Back to projects returns to the list.
When you later select this project on a property, its current location is copied into the property form for review. Editing the project does not automatically change locations already saved on properties.
Resolve a problem
If account results do not appear, check the spelling and your CRM account access. If regions do not load, select the country again and wait before saving. Correct any displayed validation message. If the form cannot be secured or has expired, reload it. If the record changed while you were editing, reload and reapply your changes. If the project cannot be loaded, return to Projects and check the filter or ask an administrator to check your access.