In just 5 steps you can add a fully working Contact Us form on your wordpress blog. No programming knowledge is required.
WordPress Plugin For ZNIEngage
If you are using WordPress then you can use the ZNIEngage WordPress plugin. You will need to upload the plugin to your plugins directory of WordPress installation then have to activate the plugin.
You can download the wordpress plugin from here.
Install ZNI Engage (zniengage.zip) — Official Setup Guide
This guide explains how to install and activate the ZNI Engage plugin from the file zniengage.zip. It includes two approved installation methods:
- Method A (Recommended): Install from your WordPress dashboard
- Method B: Install by uploading files via FTP/SFTP
Before You Start
- You must be logged into WordPress as an Administrator (or a user role that can manage plugins).
- Have the plugin file ready on your computer:
zniengage.zip - If you plan to use FTP/SFTP: have your hosting FTP/SFTP login details (Host, Username, Password, Port).
Note: Most sites can use Method A. Use Method B only if the upload fails or your hosting blocks ZIP uploads.
Method A (Recommended): Install from the WordPress Dashboard
Step 1 — Open the plugin upload screen
- Log in to your WordPress admin area:
https://yourdomain.com/wp-admin - Go to Plugins → Add New
- Click Upload Plugin (near the top)
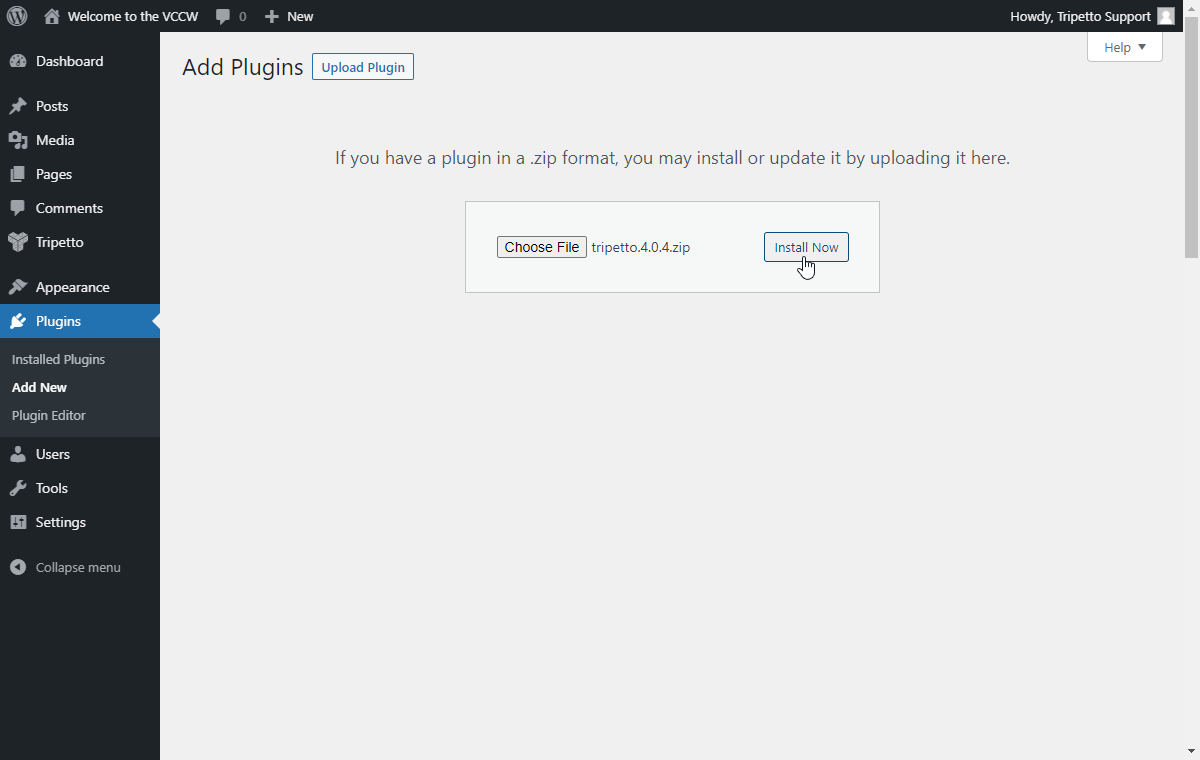
Step 2 — Upload zniengage.zip
- Click Choose File
- Select
zniengage.zipfrom your computer - Click Install Now

Step 3 — Activate the plugin
- When installation finishes, click Activate Plugin
- Go to Plugins → Installed Plugins and confirm it appears in the list
Success check: If you can see the plugin listed under Installed Plugins, it is installed. If it is also marked as Active, it is ready to use.
Method B: Install via FTP/SFTP (Windows, macOS, Linux)
Use this method if dashboard upload fails (file size limit, blocked ZIP upload, or timeout).
What you will need
- FTP/SFTP credentials from your hosting provider (Host, Username, Password, Port)
- An FTP client app (pick one):
- Windows: FileZilla or WinSCP
- macOS: FileZilla or Cyberduck
- Linux: FileZilla (or your file manager if it supports SFTP)
Step 1 — Extract zniengage.zip on your computer
Windows (Extract ZIP)
- Find
zniengage.zipin File Explorer - Right-click the ZIP → Extract All…
- You should get a folder named
zniengage
macOS (Extract ZIP)
- Find
zniengage.zipin Finder - Double-click it to unzip
- You should get a folder named
zniengage
Linux (Extract ZIP)
- In your file manager, right-click
zniengage.zip→ Extract Here (wording varies) - You should get a folder named
zniengage
Very important: The folder you upload must directly contain the plugin files. After extracting, open the folder and look for files like
zniengage.phpand folders likeassetsorincludes.If you see another folder inside
zniengageand the plugin files are inside that inner folder, upload the inner folder instead (or re-extract until the structure is correct).
Step 2 — Connect to your website using FTP/SFTP
- Open your FTP client (for example, FileZilla)
- Enter your hosting details:
- Host: often looks like
ftp.yourdomain.comor a server IP - Username and Password (from your host)
- Port:
21(FTP) or22(SFTP)
- Host: often looks like
- Click Connect
Step 3 — Upload the plugin folder to wp-content/plugins
- On the server side (remote files), open your WordPress site folder. Common locations:
/public_html//www//htdocs/
- Go to:
/wp-content/plugins/ - Upload the entire folder
zniengageintoplugins

wp-content).Final folder structure should look like this:
wp-content/
└── plugins/
    └── zniengage/
        ├── zniengage.php
        ├── assets/
        └── includes/
Step 4 — Activate the plugin in WordPress
- Go back to WordPress admin:
https://yourdomain.com/wp-admin - Open Plugins → Installed Plugins
- Find ZNI Engage and click Activate
Troubleshooting (Quick Fixes)
If you see “The link you followed has expired” or upload fails
- This is usually a server upload limit.
- Use Method B (FTP/SFTP) instead.
If the plugin does not appear after FTP upload
- Most commonly, the folder is nested incorrectly (for example:
plugins/zniengage/zniengage/...). - Fix by ensuring the structure is:
plugins/zniengage/zniengage.php(the PHP file should be directly inside thezniengagefolder).
If activation fails
- Check that you uploaded the complete folder (not missing files).
- Try re-uploading the plugin folder via FTP.
- If you get a specific error message, copy it and review it with your developer/hosting support.
Next Steps
- After activation, look for a new menu item or settings page related to ZNI Engage in your WordPress dashboard.
- If the plugin requires configuration, follow your internal setup instructions.