Skip to content

Keep the acknowledgement with the field visit.

TeamSpoor signature capture connects an available customer acknowledgement to the visit record your office reviews, alongside remarks, forms and recorded timing.

  • Visit-linked signatures
  • Customer and meeting context
  • Separate manager verification
Inside TeamSpoor
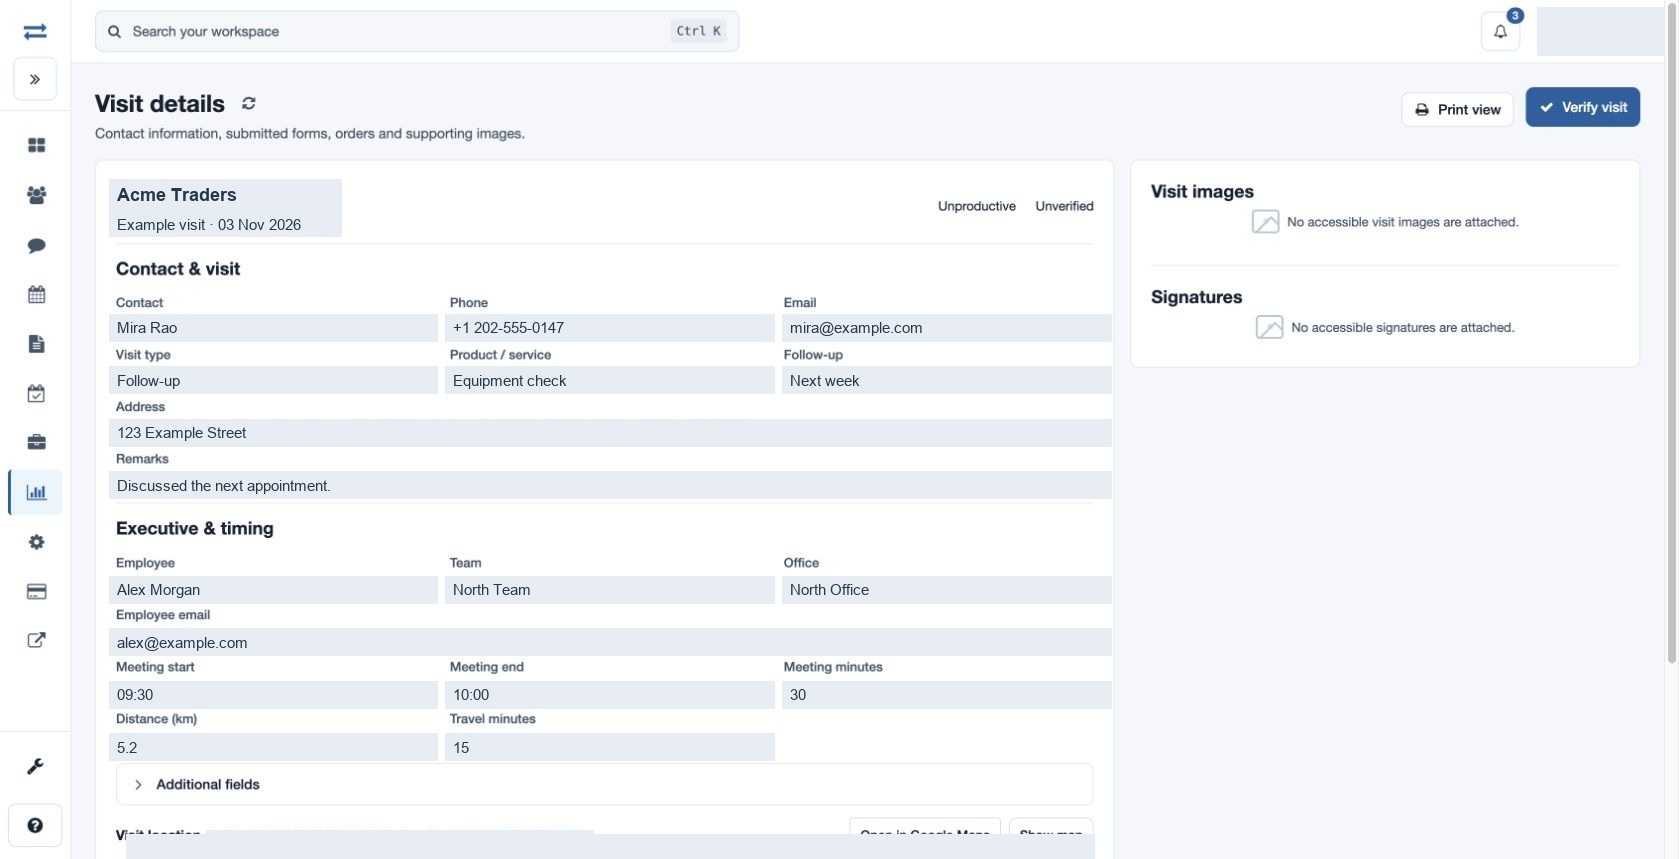
TeamSpoor visit detail showing the Signatures section alongside contact and meeting information
TeamSpoor screen · sample dataOpen full size
  1. Visit
  2. Acknowledgement
  3. Review
  1. 1Open the visit
  2. 2Find the signature
  3. 3Read the submissions
  4. 4Review the record

Make the acknowledgement easy to find later.

When the office follows up on a completed field interaction, the acknowledgement should be connected to the customer and the work being discussed. A standalone image leaves too much context outside the record.

TeamSpoor’s visit detail provides a Signatures section for accessible signature images linked to the visit. Review the acknowledgement with the customer, meeting details and other submissions. This page covers recorded visit evidence; any requirement for a regulated electronic-signature process needs a separate evaluation.

Product walkthrough

Review an acknowledgement in its full visit context.

Start with the correct customer visit.

Find the customer and date, then open the Visit ID. Review the Signatures section and open an accessible image to inspect the acknowledgement.

  1. Confirm the interaction

    Check company, contact, visit type and date.

  2. Open the available signature

    Use the signature image or its Open link in the visit detail.

  3. Read the recorded timing

    Review the employee and meeting times alongside the acknowledgement.

Read the step-by-step guide

Reports → Visits → Visit ID

Inside TeamSpoor
TeamSpoor visit details with customer information and meeting timing
TeamSpoor screen · sample dataOpen full size
Why it matters

The acknowledgement remains connected to the interaction being reviewed.
Understand what the visit record contains.

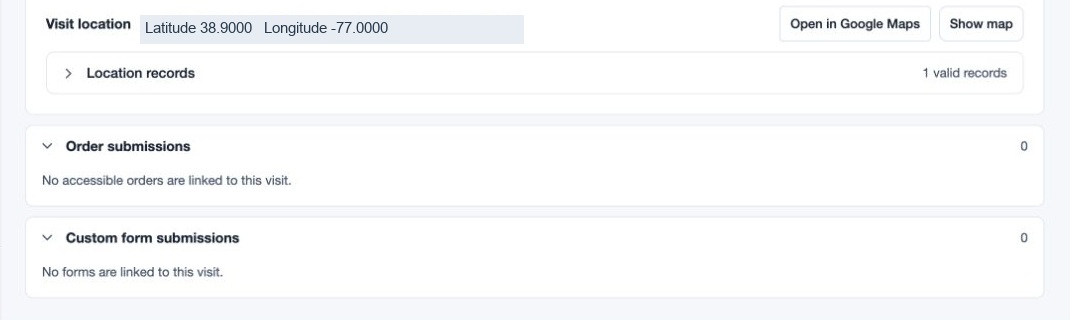
Expand the available form or order submissions and read the visit remarks. The signature is one part of that record, so the reviewer can understand the work and reported outcome together.

  1. Read the reported work

    Start with remarks, product or service and the follow-up.

  2. Inspect the submissions

    Review form questions and answers or order item details when linked.

  3. Resolve missing context

    Ask for clarification when the acknowledgement alone does not explain the outcome.

Read the step-by-step guide

Visit detail → Submitted evidence

Inside TeamSpoor
TeamSpoor linked form, image and signature evidence within a visit
TeamSpoor screen · sample dataOpen full size
Why it matters

The office can review the reported work instead of relying on a signature image in isolation.

Keep customer acknowledgement and review distinct.

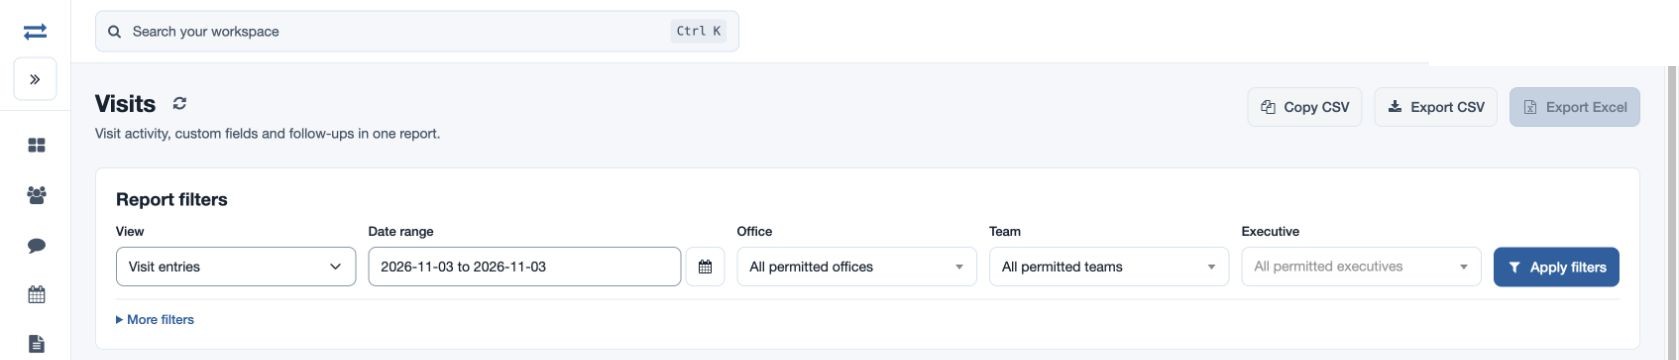
An available signature is supporting evidence. An authorized manager’s verification is a separate action performed after reviewing the record. The report can distinguish verified and unverified visits.

  1. Review all relevant evidence

    Inspect the customer details and submissions before confirming verification.

  2. Check the saved state

    Once verified, the visit shows the updated state.

  3. Use the right sharing route

    Open the visit for signature images; direct CSV and Excel reports contain data rather than attachment files.

Read the step-by-step guide

Visit detail → Verify visit

Inside TeamSpoor
TeamSpoor visit report with verification and employee filters
TeamSpoor screen · sample dataOpen full size
Why it matters

The team can distinguish recorded acknowledgement from completed managerial review.

Example workflow

Review an acknowledgement after a service appointment.

A service coordinator wants to check the recorded outcome of a customer appointment before arranging the follow-up.

Illustrative scenario · not a customer result
  1. Find

    Open the appointment’s visit

    Use customer, date and executive filters to identify the right interaction. Confirm its contact and visit type.

  2. Review

    Read the available acknowledgement

    Open the signature and inspect the service remarks and any submitted checklist. Clarify anything the record does not explain.

  3. Follow up

    Use the recorded outcome

    Review the follow-up field and decide whether another appointment is needed. Verify the eligible record only after completing the review.

What changes

The coordinator has a connected record of the visit, its available acknowledgement and the next action.

Three parts of a visit review, with different purposes.

Keep the role of each record clear when designing your process.

Swipe across the table to compare all columns.

RecordWhat it contributesWhat to check
Signature imageRecorded acknowledgement linked to an accessible visit.Correct visit, available image and surrounding customer context.
Form, order or remarksDetails of the work and reported outcome.Answers, items and instructions relevant to the appointment.
Manager verificationA separate authorized review action on the visit.The reviewer has inspected the record before confirming it.
Printable visitA reviewable presentation of recorded detail.The available information and evidence shown for the selected visit.

Put it to work in your team.

Use the same connected process in the customer interactions your team handles every day.

01

Customer service acknowledgement

Associate an acknowledgement with a recorded service visit and its submitted details. A supervisor can inspect the available signature together with notes and checklist answers before completing an internal review.

02

Delivery visit review

Use the customer visit record to review available acknowledgement and supporting images. Confirm that the process meets your delivery requirements; the page does not promise a separate logistics platform or a legally certified proof-of-delivery service.

03

Inspection handoffs

Keep the acknowledgement of a site interaction with the inspection visit. Review the recorded form, remarks and available signature together when preparing a follow-up or resolving an incomplete handoff.

Make it practical

Try it with one real field workflow.

Use the customer interaction your team needs to acknowledge, then test the capture and review flow with a representative visit. Agree what information the employee should record with the acknowledgement.

Signature images and managerial verification serve different operational purposes. Confirm separately any requirements for signer authentication, document sealing or a qualified electronic-signature service.

Your evaluation checklist

Questions, answered

The details that help you decide.

Need to walk through your own process?

Talk to the TeamSpoor team
Where are customer signatures reviewed?

Available signatures appear in visit details. Open the visit ID from a Visits report or a completed beat-plan stop, then inspect the Signatures section. Access follows visit-report permission and the employee scope available to your account.

Is a captured signature the same as visit verification?

No. A signature is supporting evidence available on the visit. Verification is a separate action available to an authorized non-executive reviewer after inspecting an unverified visit. The two describe different parts of the review process.

Are signatures included in CSV or Excel exports?

Direct visit exports contain data rather than the signature image files. Open the relevant visit to inspect the available acknowledgement. Plan your organization’s evidence-handling process around that distinction.

Does this provide qualified electronic signatures?

This page describes signature images associated with field visits. It does not claim certificate-based signing, verified signer identity or qualified electronic-signature status. Confirm any legal or regulated signing requirements separately.

See how it fits your field team.

Bring one real workflow to a TeamSpoor trial or demo.