Skip to content

Give field photos a customer, a time and a context.

Review visit photos alongside recorded location, customer details and field remarks in TeamSpoor, so the office knows which interaction an image belongs to.

  • Visit-linked image review
  • Recorded location and timing
  • Customer and employee context
Inside TeamSpoor
TeamSpoor visit detail with the Visit images section and customer context
TeamSpoor screen · sample dataOpen full size
  1. Customer visit
  2. Photo evidence
  3. Manager review
  1. 1Find the visit
  2. 2Open the image
  3. 3Read the context
  4. 4Record the decision

Make an image useful beyond the moment it was taken.

A photo sent on its own can leave the office guessing which customer, visit or reported issue it belongs to. Keeping the image with the visit gives the reviewer a starting point: the customer, executive, remarks, timing and available recorded location.

TeamSpoor’s visit detail includes a Visit images section for accessible images linked to the interaction. Review that evidence alongside the rest of the record. The location shown is recorded visit context; image review does not independently guarantee camera metadata or prove every aspect of an on-site event.

Product walkthrough

Review the image and the visit together.

Start from the customer interaction.

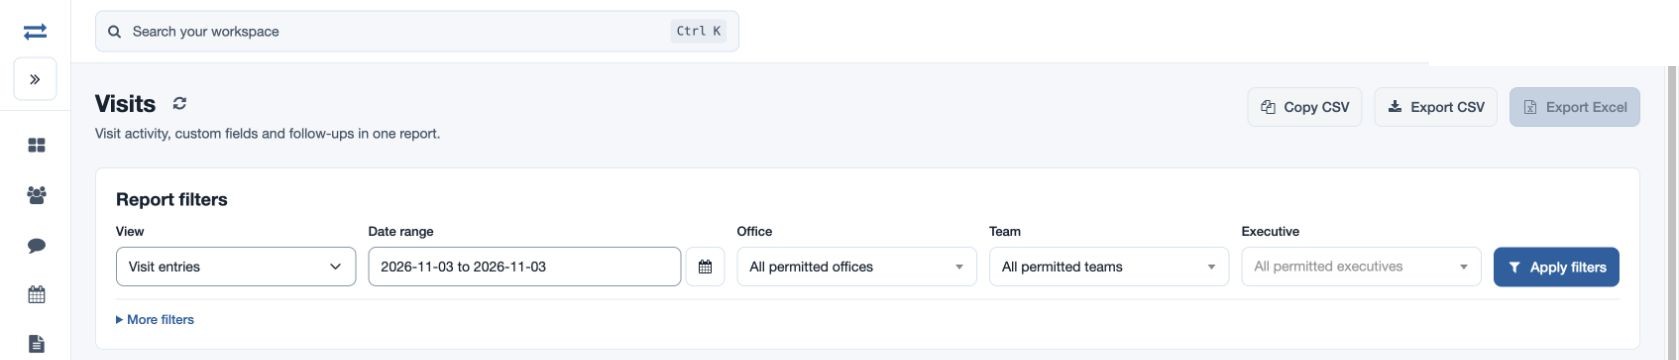
Filter by customer, executive and period, then open the Visit ID. The Visit images section shows accessible linked images. Open an available image at full size when you need to inspect detail.

  1. Confirm the customer

    Check the company and visit date before reviewing evidence.

  2. Find the linked image

    Use Visit images in the detail view and open the available attachment.

  3. Read the remarks

    Understand what the executive reported about the scene or customer issue.

Read the step-by-step guide

Reports → Visits → Visit ID

Inside TeamSpoor
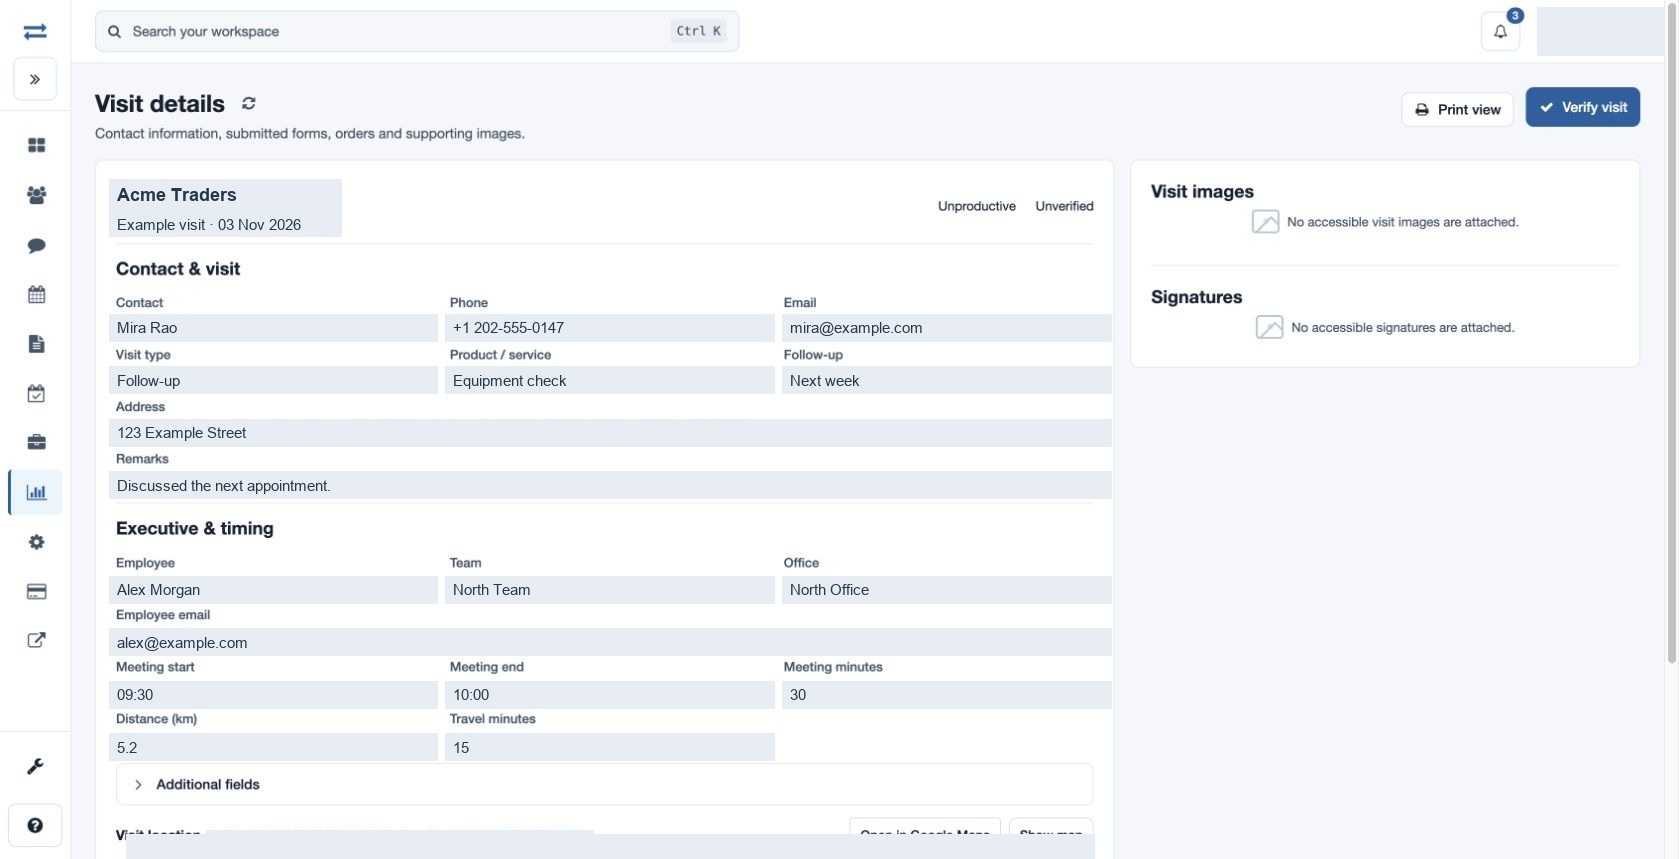
TeamSpoor customer visit details with executive and timing information
TeamSpoor screen · sample dataOpen full size
Why it matters

The reviewer knows which interaction the visual evidence supports.
Check where and when the visit was recorded.

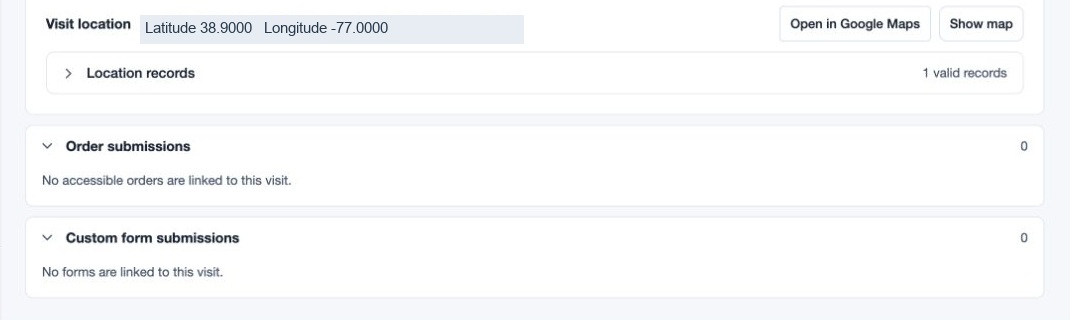
Read the visit’s recorded coordinates and meeting times. Where mapping is enabled, Show map displays the recorded point and Location records provides its time, layer and details.

  1. Check the time

    Read meeting start and end alongside the visit date.

  2. Inspect the recorded point

    Use the visit location and its available map controls.

  3. Investigate the journey

    Use Route map separately when the sequence of recorded field events matters.

Read the step-by-step guide

Visit detail → Visit location

Inside TeamSpoor
TeamSpoor visit location with recorded coordinates and expandable evidence sections
TeamSpoor screen · sample dataOpen full size
Why it matters

Location and timing add context to the photo without treating it as a complete account of the visit.

Keep the evidence with the decision.

Use the available forms, remarks and images together before verifying an eligible visit. If an attachment is unavailable, investigate the linked record and access rather than assuming no photo was captured.

  1. Read related evidence

    A form answer or remark can explain what the photo is meant to show.

  2. Check availability

    Shared evidence can be withheld when visit ownership is ambiguous.

  3. Share appropriately

    Report exports contain data rather than photo files; use the visit for image review.

Read the step-by-step guide

Reports → Visits → Verification filter

Inside TeamSpoor
TeamSpoor visit report filters for finding customer evidence
TeamSpoor screen · sample dataOpen full size
Why it matters

The review stays connected to the underlying record and the evidence actually available.

Example workflow

Review a store-display issue before planning a return visit.

A merchandiser reports a damaged display during a customer visit. The supervisor needs to understand the issue and decide what to send on the next round.

Illustrative scenario · not a customer result
  1. Locate

    Find the reported customer visit

    Filter the Visits report to the customer and date, then open the record with the display remarks.

  2. Inspect

    Review the available image

    Open the linked photo at full size and read it alongside remarks or submitted audit answers. Check the visit time and recorded location.

  3. Decide

    Prepare a specific follow-up

    Confirm what replacement material or clarification is needed. Use the customer context to plan the next visit.

What changes

The image supports a concrete follow-up instead of becoming an isolated file in a message thread.

What to check before relying on a field photo.

Use the photo as one part of the visit evidence.

Swipe across the table to compare all columns.

CheckWhere to lookQuestion it answers
Customer and ownerVisit header and Executive & timingWhich interaction and executive does this record describe?
Visual detailVisit images → OpenWhat does the accessible image show?
Recorded locationVisit location and Location recordsWhat coordinates and time were recorded for the visit?
Business meaningRemarks and submitted form answersWhat issue was reported and what action is needed?
Review statusVerification stateHas an authorized reviewer verified this visit?

Put it to work in your team.

Use the same connected process in the customer interactions your team handles every day.

01

Service completion review

Inspect photos submitted with a service visit together with the technician’s notes and configured form answers. Use the combined record to decide whether the office has enough information for follow-up.

02

Retail display checks

Review a store image in the context of its customer visit and reported observations. Compare the intended store and visit date before using the image to discuss a display or merchandising exception.

03

Site inspection evidence

Keep visual observations attached to the visit being reviewed. Establish a clear evidence standard for the inspection and use the available image, remarks and location context to identify questions for the inspector.

Make it practical

Try it with one real field workflow.

Choose a visual reporting task your team already performs, such as a display review or site condition check. Test how the image is submitted and then located by the manager.

If your process requires specific camera timestamps, embedded GPS metadata or a particular capture restriction, confirm those requirements directly during the demo.

Your evaluation checklist

Questions, answered

The details that help you decide.

Need to walk through your own process?

Talk to the TeamSpoor team
Where can managers view visit photos?

Open a visit ID from the Visits report or a completed beat-plan stop, then review the Visit images section. Select an available image or its Open link. Visit-report access and permission to see the employee are required.

Does a visit photo prove the employee’s exact location?

Review it with the recorded visit coordinates, timing and surrounding evidence. The record supplies context, but an image or map point alone does not establish every fact about the visit or the origin of the photograph.

Are image files included in report exports?

No. Direct visit report exports contain data rather than photo and signature files. Open the visit detail to inspect available attachments. Archive visit exports also exclude images and attachments.

Why might an image be unavailable?

The attachment may be unavailable, no image may be associated with the record, or an ambiguous shared visit reference may prevent ownership from being established. A zero count alone does not prove an image was never captured.

See how it fits your field team.

Bring one real workflow to a TeamSpoor trial or demo.