To setup AI chatbot for WhatsApp first goto Admin Settings page
Create a Chat Bot
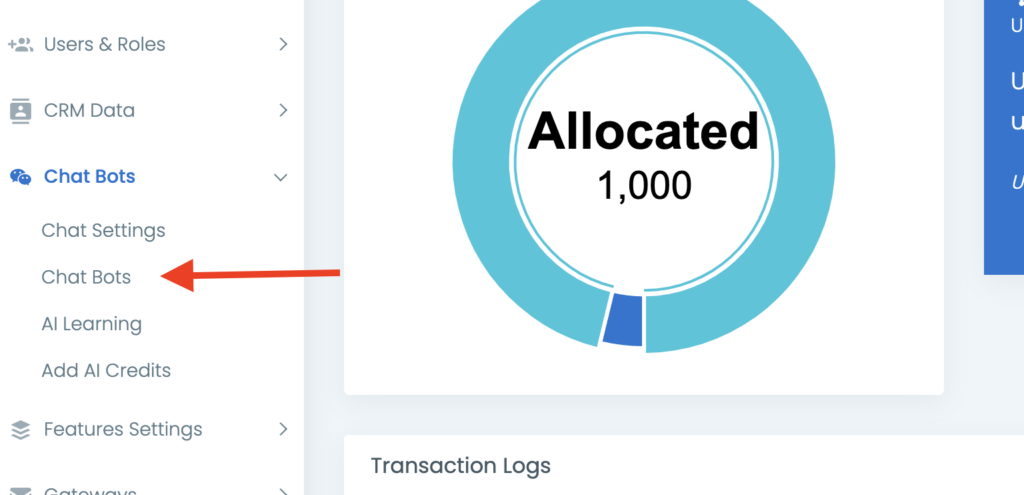
Select “Chat Bots -> Chat Bots” from the left navigation menu.
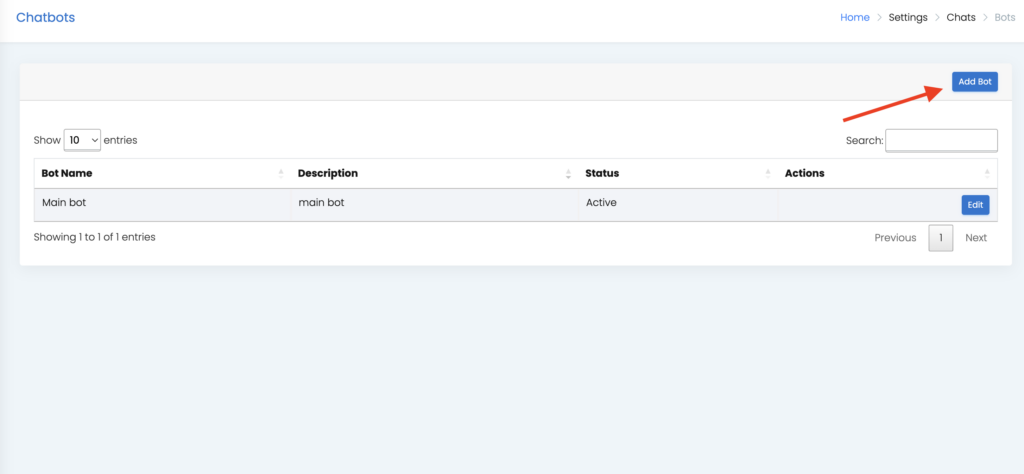
On the top right corner click on “Add Bot”
Fill in the details of the Chat Bot. Give a proper name and description so that you can recognise the usage of this chatbot. Click on “Add New Bot” once you are done with adding Name & Description.
Once, the bot is successfully created, you will be taken to it’s settings page.
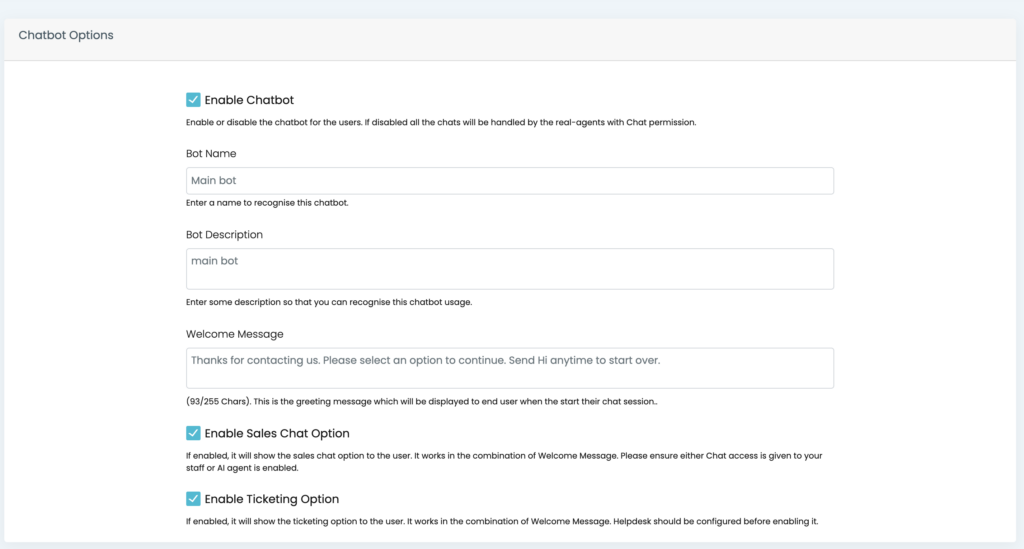
Fill in all the details as required:
Bot Name: This is the name of the bot you have created in the last step. It won’t be shown to the users and it’s purely for your internal purpose.
Bot Description: This is the description of the bot you have created in the last step. It won’t be shown to the users and it’s purely for your internal purpose.
Welcome Message: This is the message which will be shown to the users when they start a new session with your bot. Every session is 2 hours long and after that this message will be shown. This message will also be shown when they send a catch phrase.
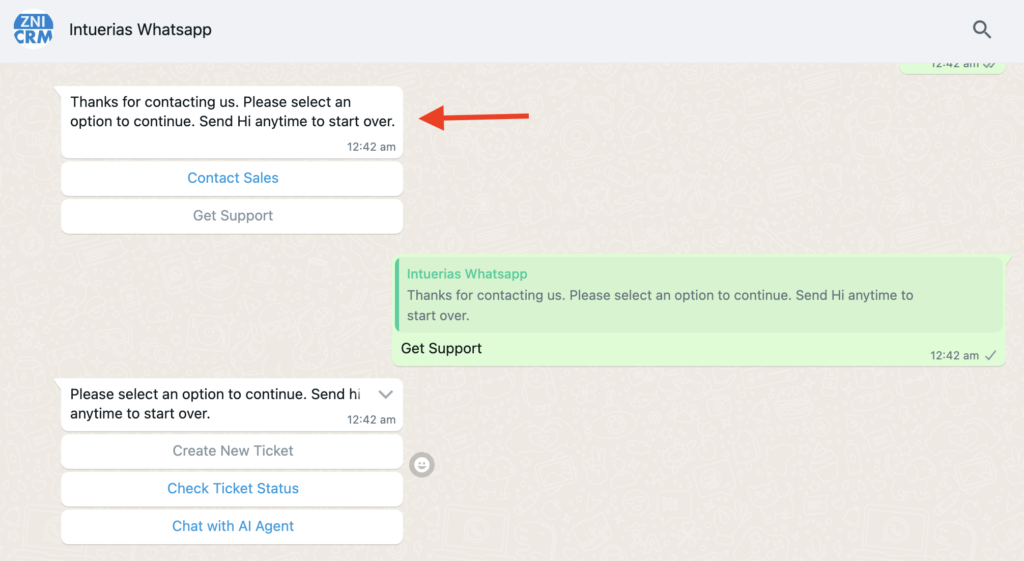
Enable Sales Chat Option: If this is enabled then along with Welcome message user will also get an option to select “Contact Sales” button.
If AI bot is enabled then the chat will be handled by an AI agent, otherwise it will be forwarded to a human agent.
Enable Ticketing Option: If this is enabled then along with Welcome message user will also get an option of “Get Support” button. For this to be enabled, Helpdesk should be configured in the CRM first.
If a user clicks on this then they will be presented with three more options:
1. Create New Ticket
2. Check Ticket Status
3. Chat with AI Agent
Enable AI Chat Options
If you want that your customers can interact with an AI agent then you will have to enable AI options on the same page.
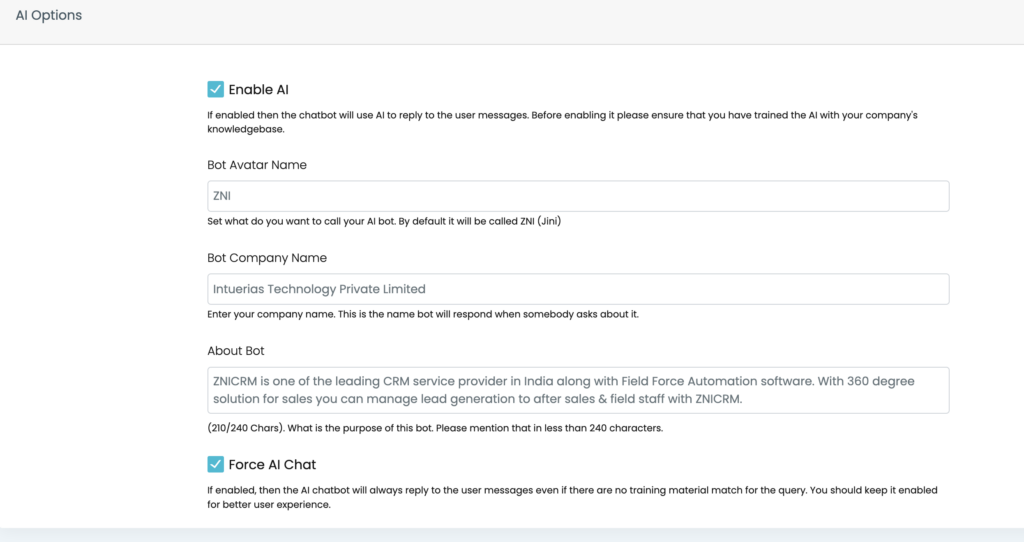
This option can only be enabled if you have added some training documents to train the AI agent with your company’s knowledgebase.
Enable AI: Check this if you want chat bot to automatically chat with your customers.
Bot Avatar Name: This is the public facing name of the WhatsApp chatbot.
Bot Company Name: Input your company’s name here. This is what it will provide to the customer if being asked about it’s details.
About Bot: Mention what is this bot about and what is your core business solution.
Force AI Chat: If this is not selected then after working hours the user will get an automated response set from the Chat Settings page. Also, the AI bot will not respond to any query which it couldn’t find from the training pages. (Disabling this is NOT recommended).
Add AI Credits
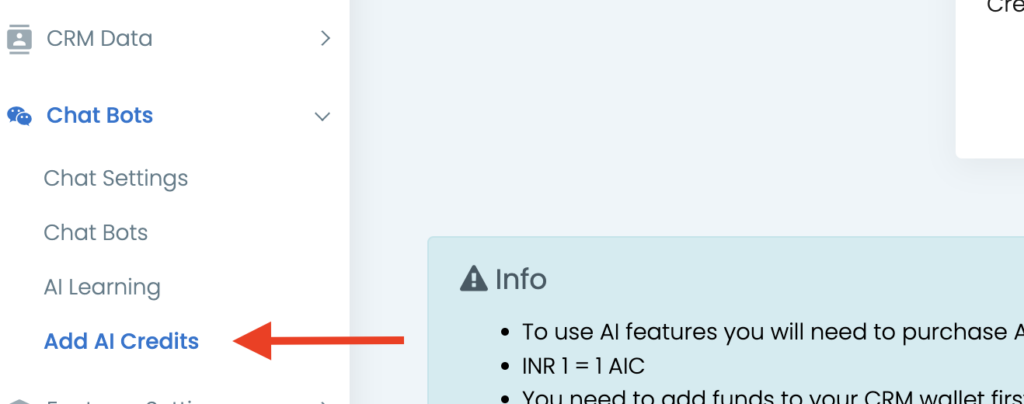
AI Credits or AIC are the billing credits for AI based chats. You will be charged these credits for every message or for training the AI bot.
These are different from the wallet amount you add. AIC are used to give you a control on your spending. You can start with as low as 1000 AIC and buy upto 50,000 AIC in a single transaction.
To buy the AIC you need to add funds to your wallet first. To learn how to add funds to your CRM wallet you can visit How to add funds into ZNICRM wallet?
Once, you have added the funds goto Settings -> Chat Bots -> Add AI Credits
The next screen will show your current AIC balance, Wallet balance and the AIC you want to transfer from the wallet.
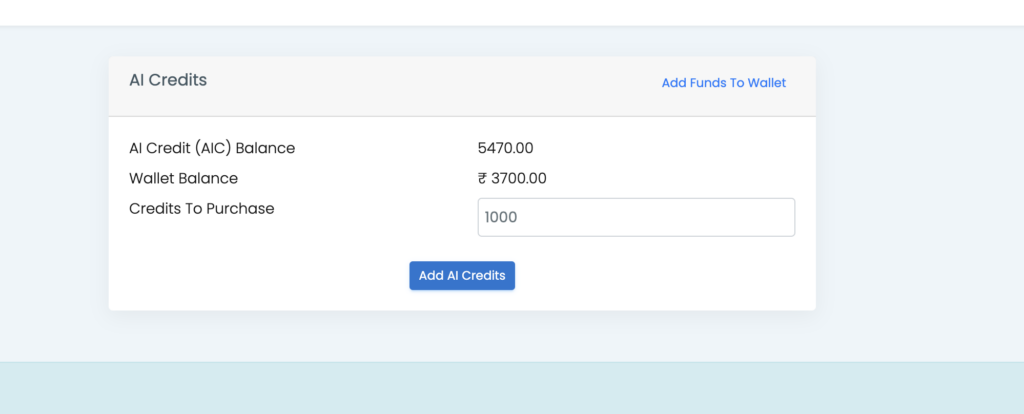
On the “Credits To Purchase” field, add the desired numeric value and click on “Add AI Credits” button.
Basic Chat Settings
To setup working hours, welcome message without an AI agent or set which AI bot to use with the WhatsApp you should goto Admin Settings -> Chat Bots -> Chat Settings
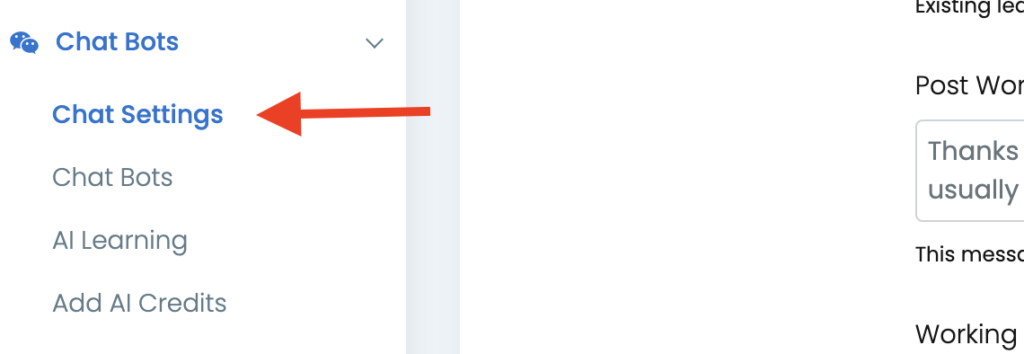
Here you will get plenty of settings to control your chatbot working.
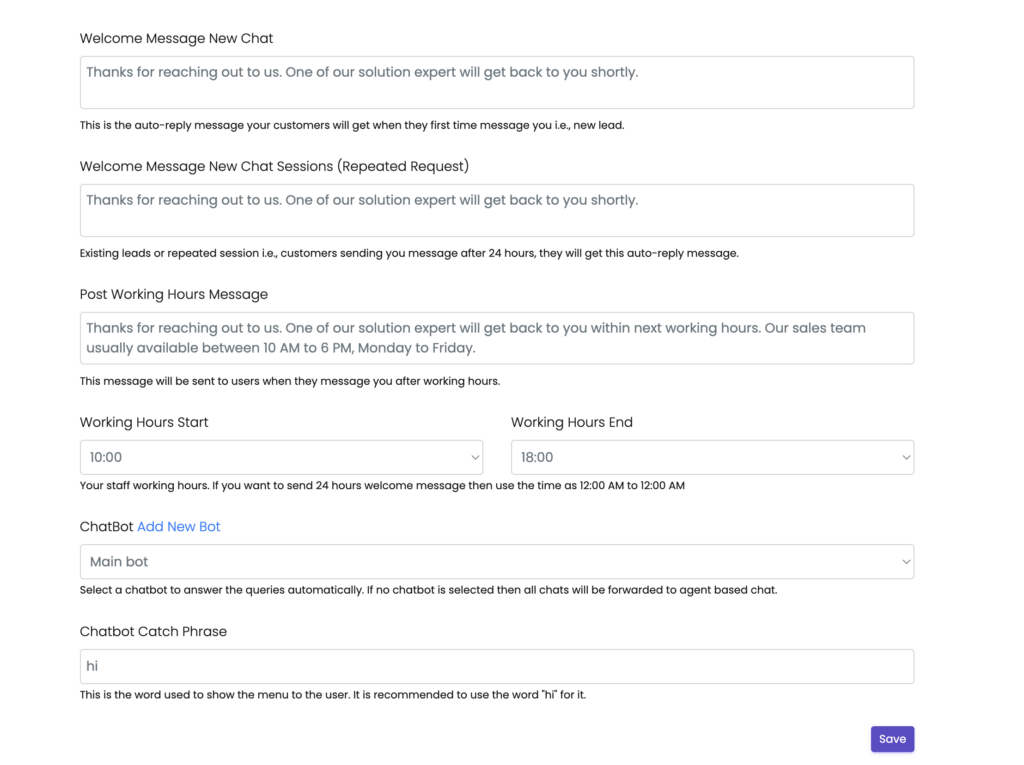
Welcome Message New Chat: This is the message your customer will get automatically on their first request if AI Chat is not enabled.
Welcome Message New Chat Session: A session is of 24 hours in case of WhatsApp, so on every new session your user will get this message if AI chat is not enabled.
Post Working Hours Message: If you have set working hours and a user sends a message after that then instead of Welcome Message they will get this message if AI chat is not enabled.
Working Hours (Start/End): You can set your working hours from here.
ChatBot: Select the chatbot you have created in step 1 previously. You can change this settings anytime.
Chatbot Catch Phrase: This is the word, which will be tracked and whenever a user sends this on a message as a standalone message then Chatbot Menu will be sent to them.

Train Your Chatbot
You can train the chatbot with your company’s knowledge base through uploading PDF or TXT (plain text) files or by let it crawl and scrape the data from your company’s website or support system.
To train your chatbot visit Admin Settings -> Chat Bots -> AI Learning

Once the page is opened you will find two options to manage your training data.
- Upload a file (PDF or TXT)
- Crawl a page and scrape the data
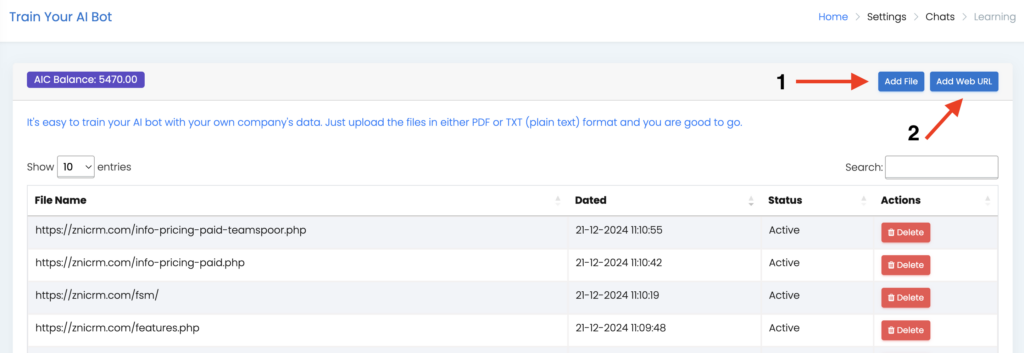
Once you upload the data file or add the URL it will take 15 to 30 minutes to train the AI bot with your data. After process is completed, you will get an email with the status of the file training process.
If anytime you want to change the data or retrain the AI then you can delete the previous file and upload a new one.
Please note every time you add a file or URL, you will be charged 200 AIC for upto 5,000 characters of training data including special characters, white space or line breaks etc.